Home » Archives for April 2025

Month: April 2025

Farm Fresh Deviled Eggs with Homemade Mayonnaise

Deviled Eggs are always a hit at a gathering.  They just say “you’re home with family!”  And if you can make deviled eggs using your own homemade mayonnaise?  Well, you’ve hit a home run.

The secret revealed here is making the mayonnaise in a wide-mouth mason jar, using an immersion blender.  Once complete, you simply put the lid on the jar to store in your fridge.  No need to clean a container!

Simple and elegant – you’ll love this recipe and it may not be for a gathering but simply for your own enjoyment!

Farm Fresh Deviled Eggs with Home Made Mayonnaise

Better than you can imagine!
5 from 5 votes
Cuisine American

Equipment

  • 1 Immersion blender or regular blender

Ingredients
  

Homemade Mayonaise

  • 1 egg as fresh as possible
  • 1 Tbsp dijon mustard
  • 1 tbsp apple cider vinegar
  • seasoned salt to taste
  • 1 cup avocado oil approximately

Deviled Eggs

  • Hard boiled fresh eggs
  • chopped pickles can include onion and garlic from pickles as well
  • mayonnaise

Instructions
 

Homemade Mayonnaise

  • Add egg, dijon mustard, apple cider vinegar and seasoned salt to a wide mouth medium mason jar. Blend with an immersion blender.
  • Slowly drizzle in oil while blending with ab immersion blender. Blend until it reaches a thick consistency.

Deviled Eggs

  • Cut eggs in 1/2. Scoop out yolks and add to a small bowl.
  • Add chopped pickles (include onions and garlic from pickle jar.
  • Add small amounts of mayonnaise at a time and mix. Keep adding small amounts and mix to your liking.
  • Fill the egg white halves.

Video

Keyword eggs, Mayonaise

Braised Short Ribs

Ten Acres of Texas Tenacity

Purpose, risk, and rhythm. Kim Standley’s small farm operation is ten acres of tenacity. Echoing generations of our agrarian Texas grandparents, Kim continues and somewhat revives the tradition of Texas farming with a few modern conveniences. I went to visit the “Heavy Metal Homesteader” to learn about her farm and make some delicious food.

Texas Homesteading

Our Texas roots run deep on the family farm – sustenance from the earth was a way of life supporting families’ food needs and providing a necessary income.  

In 2021 the USDA Economic Research Department estimated that 89% of all farms were small family farms and guess which state boasted the most – Texas, ranking first in cattle, sheep, goat, and cotton sales.

Just the term, “family farm” signals stubborn independence and self-reliance.

So, how did Kim begin her journey to food chain independence?  “My husband wanted some acreage and so we found this spot in Santa Clara, Texas.  Then he asked me if I wanted a chicken – and that led to another chicken, and another…..  then we added goats to breed, a cow (Lola)and steer, bees, and a substantial 38’ by 42’ garden.”  

Kim is committed to sustenance.   Case in point:  when she raised and butchered her own steer, she asked for the tallow from the butcher to create her handmade soap.  She also asks for the bones so she could create her own bone broth (great for joints!).  She takes it a step further and reduces those bones to ashes to be spread on her garden for their essential elements.  “Never throw anything away!” is Kim’s mantra!

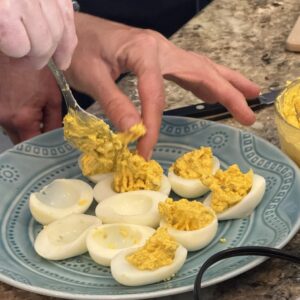
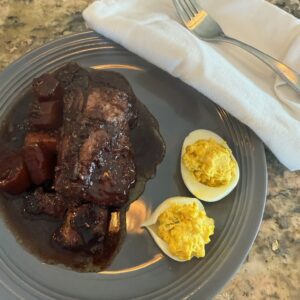
Pressure canning is also an important aspect of preserving her bounty.   I was the culinary beneficiary of her amazing canned dill pickles.  She used them in her deviled eggs that accompanied the braised short ribs she prepared from her lovingly raised beef.  

“It is a lot of hard work to take care of these animals, but they fill my soul.  You have to go into it (farming) with your eyes open – there are always projects that need to be done on a farm.”  

In the Kitchen

When I arrived at Kim’s busy kitchen – she had tallow cooking for her soaps and she shared a few beautiful bars with me.  You can find Kim and her soaps at the Cibolo Grange Farmers Market  and find out more on her website:  www.theheavymetalhomesteader.com 

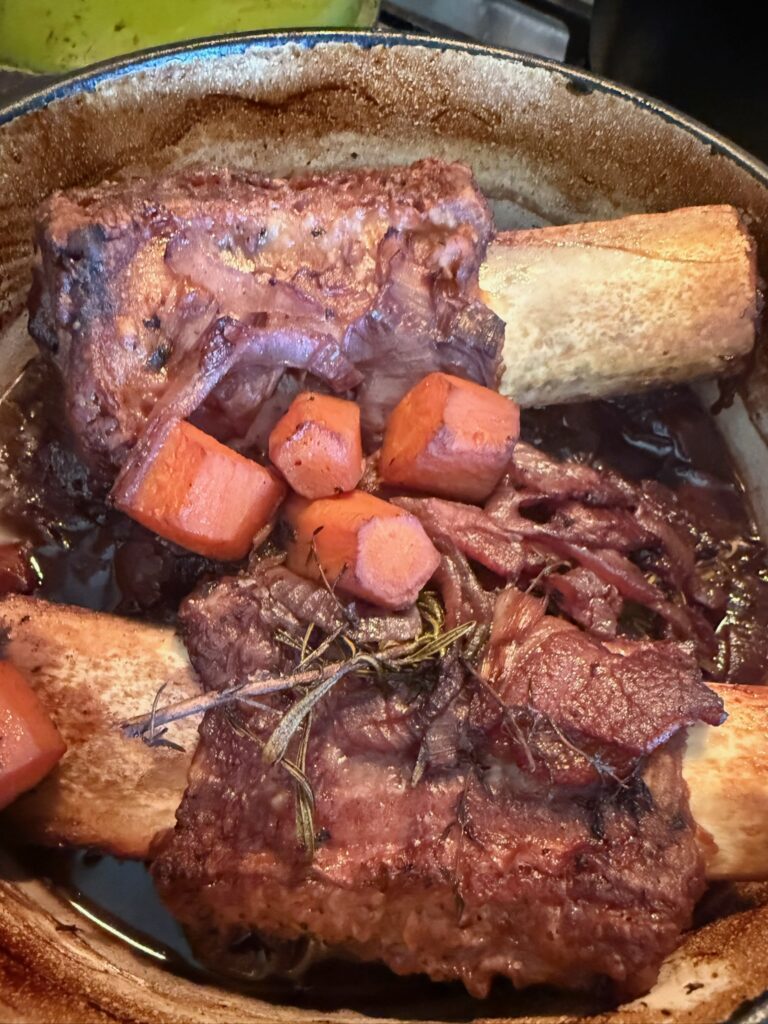
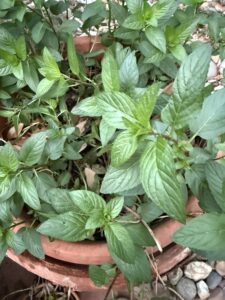
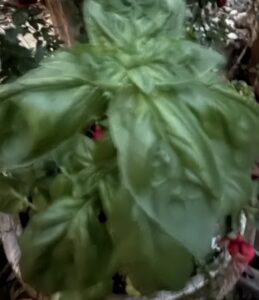
We immediately set to work slicing homegrown carrots and onions for the braised short ribs while she shared the skinny on the joys and tears of farming.  One thing she is most adamant about is eating what is in season.  So her cooking revolves around the bounty of her garden.  (See Braised Short Ribs recipe below).

After prepping the ribs for a 2 ½ hour stint in the oven, we set to work on the deviled eggs.  Eggs from her chickens, pickles from her garden and a homemade mayonnaise to boot! 

 Pouring all the ingredients for the mayonnaise into a mason jar and using an immersion blender to mix it all together makes for an easy preparation. . And your mayonnaise is already in a jar!  

Now for the highlight of my time with Kim:  holding two of the triplet baby goats born a few hours earlier!  That was the joy that warms your heart and makes all the hours of hard work worth every minute!  

Braised Short Ribs

Falls apart on your plate!
Course Main Course
Cuisine American

Equipment

  • 1 Heavy dutch oven

Ingredients
  

  • 8 Whole beef short ribs
  • dash kosher salt and pepper to taste
  • 1/4 cup flour
  • 1 lb bacon
  • 2 tbsp evoo
  • 1 med onion diced
  • 3 large carrots diced
  • 1/2 bottle red wine
  • 2 cups beef broth
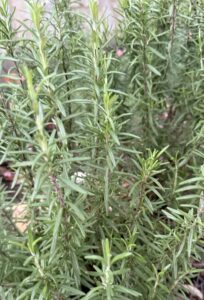
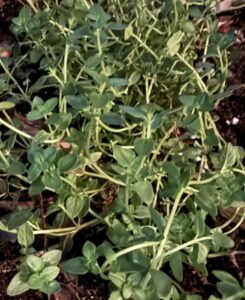
  • 2 sprigs, ea thyme and rosemary

Instructions
 

  • Salt and pepper ribs. Coat in flour.
  • In a large ovenproof dutch oven, cook bacon until crispy. Remove bacon from grease.
  • Add EVOO to grease. Turn heat to high. Add ribs and brown on all sides - about 45 seconds per side. Remove ribs.
  • Turn heat to medium. Add onions and carrots. Cook for 2 minutes. Pour in wine. Bring to a boil and cook for 2 minutes
  • Add broth, salt and pepper. Taste and add more seasonings if desired. Add ribs, thyme, and rosemary sprigs. Cover and place in a 350 oven for 2 hours. Reduce heat to 325 and coo for an additional 30 - 45 minutes. Let sit for about 30 minutes before serving.

Video

Keyword Short Ribs, Braised, Pot short ribs

7 Herbs I plant in Spring

Spring is planting time!  If you don’t have room or time for a full-fledged garden, you can add lots of flavor to your meals and drinks by simply planting a few key herbs.

Here are the seven I always make sure to have in my garden:

  1.  Mint:  If mint finds the right location it will take over your garden.  For this reason, I like to plant my mint in a container.  By covering your mint on those frozen winter nights, you have a chance of saving it year after year.  Tea, water, and a good watermelon salad are just made more delightful with a fresh sprig of mint!

2.  Rosemary:  A beautiful landscaping plant that with the right conditions will perennially grace your garden.   It will thrive in full or partial sun.  Chicken, fish and pasta are “flavored up” with the addition of fresh rosemary.  Also, a sprig will add a touch of beauty to appetizers.

Here’s a trick I learned from the Fredericksburg Herb Garden:  Take your fingers and run them along a sprig to release the aroma.  Insert in white wine and place in the fridge for an hour or so – a beautiful herbaceous addition!

3.  Thyme:  Here’s another herb that can make it over the winter and also add a nice touch to your landscape.  I just love it when beauty and culinary collide!  I particularly like lemon thyme.

4.  Basil:  Basil just screams Italian, but it can also be added to water for a fresh flavor, salads, and even poultry and fish.  Of course who doesn’t love pesto!

5.  Chives:  This is a newcomer for me, but I wouldn’t be without it!  Fresh just beats dried on this herb every time.  Also, since it is typically and annual, you can freeze for that baked potato in the winter.

6.  Oregano:  Either potted or in the ground – this herb has a huge chance of making it over the winter.  It’s one that I cover with a sheet on icy nights with great luck in maintaining its green.  Fresh oregano is unbeatable on meats and of course Mexican cuisine loves it!

7.  And last but definitely not least:  Parsley!  Fresh parsley- in my mind is no comparison to the dried.  And it makes just about any platter, charcuterie, or dish pretty.  It is so handy to have in your garden to snip for a little embellishment.  And it cleans your breath!  I prefer a planter for parsley as I’ve had trouble with pill bugs when it’s in the ground.

And there you have it!  My seven faves!

Watch Video


Fail-Proof Creamy Coconut Pie

Spring time just says it is the season for coconut pie!

I love anything coconut and well, a coconut cream pie – that is just the ultimate.  This recipe uses coconut milk and unsweetened shredded coconut for a beautiful creamy but not too sweet desert.

Also, any fear of making a cream pie that is too runny is completely abated by simply following the steps.

This pie received rave reviews when I made it for a recent dinner party.  “The best I’ve ever had”, “the creamiest”, and “not too sweet” were all comments!

EnJOY!


   Watch Video

Fool-Proof Creamy Coconut Pie

Coconut milk and unsweetened coconut make it the "Bomb"!
Course Dessert
Cuisine American
Servings 8

Ingredients
  

  • 1 refrigerated prepared pie crust baked according to directions and cooled

Coconut Pie Filling

  • 1/2 cup heavy cream
  • 1 can coconut milk full-fat
  • 1/2 cup milk full-fat
  • 1 1/4 cup unsweetened shredded coconut
  • 1 tsp vanilla extract
  • 4 egg yolks large
  • 4 tbsp cornstarch
  • 3/4 cup sugar
  • 4 tsp butter

Whipped Cream Topping

  • 1 1/4 cups heavy whipping cream
  • 3 tbsp sugar
  • 1 tsp vanilla extract

Instructions
 

  • Bake the crust in a 9 inch pie pan according to directions. Cool

Coconut Cream

  • Add the egg yolks, vanilla extract, and cornstarch into a small bowl and mix together with a whisk. Set aside.
  • In a sauce pan, pour in the cream, milk, coconut milk, salt an sugar and whisk on medium heat. Continue to stir the mixture occasionally and bring to a boil.
  • Reduce the temperature to low heat and continue to boil for 2 minutes.
  • Remove about 1/2 cup of the cream mixture and slowly pout into the egg mixture, while whisking quickly.
  • Slowly pour the cream and egg mixture into the sauce pan (continue low heat) while whisking vigorously. Stir for about 2 minutes until thick.
  • Remove pan from heat and add the butter and shredded coconut, mixing well. Cool mixture and pour into crust. Cover and refrigerate for about 2 hours until completely cooled.

Whipped Cream Topping

  • Into a chilled bowl, add the whipping cream, sugar and vanilla extract. Whip for about 4 - 5 minutes until peaks are formed. Spread on the cooled coconut filling. Top with toasted coconut*. Keep refrigerated until serving.

Notes

  • to toast coconut, take about 3 tbsp coconut and place in a heated flat bottomed pan.  Continue to stir until slightly brown.  
  • Pie can keep up to 5 days in the refrigerator.
Keyword coconut pie, cream pie, toasted coconut, coconut milk