Home » Uncategorized » Page 3

Category: Uncategorized

Sour Dough Loaf

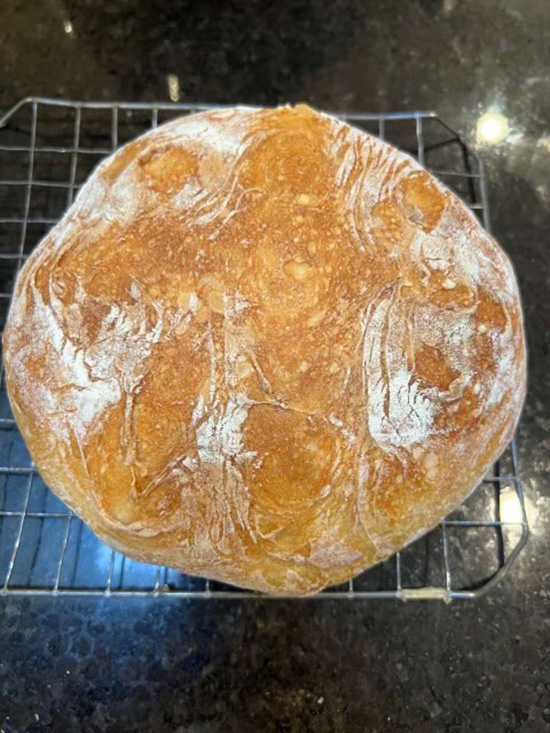
Few aromas in life match that of fresh bread cooking in the oven. And then to follow up, the crispness on the outside and tenderness on the inside of a loaf of freshly made sour dough bread is pure heaven.

Sour dough starter can be found from a friend or even the internet. At first glance, this recipe seems complicated, but once you’ve done it a couple of times – you’ll have it down, Sour dough bread is easily digestible, giving you a feeling of satisfaction but not stuffiness. With fresh butter – truly nothing is better!

Branch out, try it, and you will be hooked. It’s truly worth the organization of your time to make it work.

Sour Dough Loaf

Equipment

  • Large oven-proof pot with lid
  • Kitchen scale
  • Parchment paper
  • Glass jar with lid

Ingredients
  

  • 50 g (1/4) Cup active sour dough starter
  • 350 g (1 1/3 C + 2 tbsp warm water
  • 500 g (4 Cups + 2 tbsp) bread flour
  • 9 g (1.5 tsp) fine sea salt

To Replenish Starter

  • 60 g active sour dough starter
  • 60 g water
  • 60 g unbleached flour

Instructions
 

  • 1. 1. In the Middle of the day before wanting to bake bread: Take starter from the refrigerator. Using a scale with a jar set on top and set to “0”. Measure 60 g starter. Take scale to “0” again. Measure in 60 g water and stir. Take scale to “0” and add 60 g flour and stir. Loosely cover and set on counter until 6-10 PM. (I like to set under my under-counter light)

Make the Dough: 

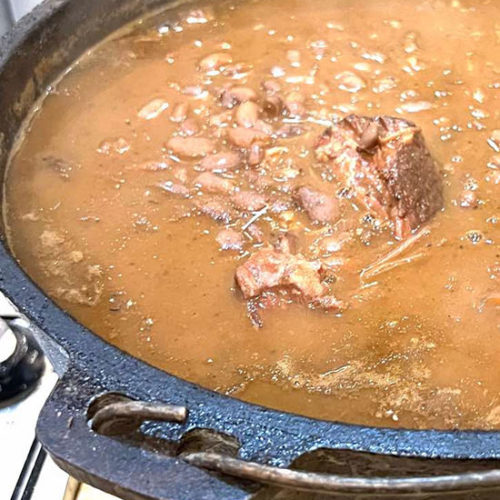
  • 2. In the evening, set a 8 1/2” bowl on the scale and set to “0”. Add 50g starter. Set scale to “0”. Add 350 g warm water and mix together thoroughly. Set scale to “0”. Stir in 500 g bread flour and 9 g or 1 1/2 tsp salt. Finish mixing by hand to fully incorporate the flour. 
  • 3. Cover with a damp towel and let rest for 30 minutes. 
  • 4. Take this time to replenish your starter with fresh water and flour in a new jar. (I print the date on jar)
  • 5. After dough has rested, work into a smooth ball . Grab a portion of the dough and fold it over, pressing your fingertips into the center. Repeat, working your way around the ball until it tightens - about 15 seconds.

Bulk Rise: 

  • 6. Cover the bowl with a damp towel and let rise overnight (8-10 hours) at room temperature - approximately 70 degrees. The dough is ready when it has doubled in size.

Shape:

  • In the morning, move the dough to a lightly floured cutting board. (I also flour my hands) Repeat the pull and press function from the previous night. Flip the dough over and let it rest 5-10 minutes. Meanwhile line a bowl with a towel dusted with flour (or use a proofing bowl) and lift dough into it, seam side up. 

Second Rise:

  • Cover the bowl and let it rest for 30 - 60 minutes. Preheat oven to 450 degrees. Cut a sheet of parchment paper to fit the size of you baking pot, leaving excess room around the sides.

Score:

  • Place the parchment over the dough and invert the bowl to release. Sprinkle th dough with flour and gently rub the surface with your hands. Using the tip of a small, serrated knife or a razor blade, score the dough with an “X”. 

BAKE:

  • Cover dough with lid and bake for 20 minutes. Remove the lid and bake an additional 30 minutes.Remove and let cool for 1 hour. Sourdough is best consumed on the same day it is baked. Store at room temperature in a plastic bag for one day. 

Notes

  • If we don’t consume in one day (which is hard), I slice and freeze. You can also make croutons and freeze. 
  • This may seem complicated at first glance, but once you’ve done it a couple of times, it makes sense.

RV Kitchen Essentials

Being prepared makes hitting the trail so much easier and faster.  Whether you are a tent camper or RV’er, having a list of basic items assures you’ll be ready to take off for adventure!

Megan Traeger shares her list of staples she keeps in her RV.  If you are a tent camper – you might keep a plastic box  stocked with essentials.

Happy Exploring!

Must pack in the kitchen of the airstream:

  • S’mores ingredients (if you want to skip out on extra packing, buy the Keebler’s fudge stripe cookies. Chocolate and graham crackers in one.)
  • Kreutz Pancake mix (with mixin’s like fruit or pecans or chocolate chips)
  • H‑E‑B trail Mix (everybody can grab their flavor of choice and they come in resealable bags!)
  • Pasta (probably the most versatile thing I carry. I can add red sauce or just olive oil, or I can add cheese and taco seasoning. I can cook a cup of it or cook the whole bag and save the rest for leftovers.)
  • Cereal (for those mornings that we need to quickly pack up. Our kids will typically pour cereal into a cup, and some milk and a spoon and take it to the truck for on the go breakfast.)
  • Hot sauce and Tortilla chips (no further explanation needed. We do love grabbing salsas or queso when we stop at different places to try their stuff.)
  • Tortillas (another versatile item. I can make breakfast tacos, or quesadillas with leftover chicken or beef from the night before. Or I can heat them up, add some butter and sugar and call it dessert.)
  • Bread (I don’t skimp on my bread so I always buy Dave’s Killer Bread. I have yet to NOT find it when traveling!)
  • Fritos and bean dip (this is a don’t ask don’t tell snack.)
  • PB/J (sometimes you make sandwiches for your kids. Sometimes you just make them for yourself. I’m also a huge fan of packing Justin’s peanut butter packets for hiking snacks. And jelly will be used at breakfast sometimes too)
  • Granola (we buy the Bear Naked cacao and Cashew butter bag. I can eat this for breakfast, snack, or dessert. I typically will toss it with some Greek yogurt.)
  • Dried fruits (hours in the car can lead to useless snacking. Might as well eat some dried mango or banana chips!)
  • Pita chips (clearly can be used with some hummus. But the other day I had tomatoes, mozzarella, basil, and balsamic vinegar. I used the pita chips as my base for all of it and they were perfect bite sized bruschettas.)
  • Olive oil
  • Salt and pepper grinders
  • Coffee (we love that when we travel we can find some really great and unique roasters throughout the country.)
Fridge:
  • Milk (for cereal and kids)
  • Creamer (for coffee to deal with kids)
  • Eggs (I usually only pack half a dozen for space saving.)
  • Peppered Bacon from Granzins (sometimes I’ll make this to go with pancakes, or in breakfast tacos. One time I threw it in cabbages that we were taking to a potluck. Or I can smear some Nutella on it for dessert. Best bacon I’ve ever eaten!)
  • Butter
  • Sandwich condiments 
  • Lunch meat and cheeses
  • Fruits (we eat a ton of fruits so this is a revolving door. It’s especially fun to get local produce that is native to an area.)
  • Hummus
  • Bell peppers (slice them up to throw in a omelet. Slice them up to dip in hummus. Or slice them up to sauté for dinner.)
  • Sparkling waters
  • Pound of ground beef 
  • Shredded Cheese (another thing that can be added to a ton of things.)
  • Sausage (use it for breakfast, snacks, or dinner.)
  • Large Greek Yogurt (at home I hardly buy the big containers of yogurt but on the road we always have one in the fridge.

Quick and fun breakfast
Banana split breakfast
Cut banana in half, scoop in yogurt instead of ice cream
Top with fresh fruits and granola
Sometimes I’ll add some chocolate chips or sprinkles to the girls.

On the run lunch hack
I always buy paper food boats. That way if we are in a pinch, I can throw a sandwich and some goldfish and some fruit gummies in a tray and call it lunch for the kids. In the adults trays I may cut up some bell peppers and scoop in some hummus to take in the car. Easy clean up.

Dinner suggestion
When planning your dinners be mindful of how many dishes you are getting dirty. I like to simplify and try to stick to one pot meals if possible. I’ll load the ingredients into a paper bag to keep them all together in the fridge. This then becomes my trash bag as I cook.

After dinner space saver
If I know I’m making chicken or beef and may possibly have extras, I’ll cook all of it and then put the remainder of the cooked meat in single compartment meal prep containers (from H‑E‑B) to keep in the fridge. I can reheat the meat the next day and add it to lunch as a quesadilla or to top a salad.


Cowboy Beans (Easy All Day version)

It’s a Texas staple – cooked pinto beans. Beans are easy to store in their dry mode, thereby making an ever ready item back in the chuckwagon days and before grocery stores were readily available in rural areas.

This recipe is simple, using only a few ingredients, but the absolutely secret is the salt pork! It provides a flavor that seals the deal on scrumptious beans. Add a little chili powder, and you have a mouth full of pure joy.

Throw the beans in a pot, cover with water, and add the salt pork. Turn the heat on low and go about your day!

Cowboy Beans (Easy All Day version)

Course Side Dish

Ingredients
  

  • 1 pound pinto beans
  • 1 package salt pork (about ¼ pound)
  • 3-4 garlic cloves according to taste
  • 1 tbsp chili powder
  • salt and coarse cracked pepper to taste

Video

Zesty Turkey Salad

The decorations are packed away, the tree is down, but there may remain a remnant of the holidays, frozen in your freezer- left-over turkey. Here’s a recipe to take that ‘ol turkey to another level: Zesty Turkey Salad.

Spicy pickles, horseradish, and cumin come together in one taste sensation! And the recipe only has two steps! Ok, there is a little dicing, etc. but on the whole, its a snap.

You can serve it on lettuce leaves as I show here,or thinly slice a baguette and make mini sandwiches ready for lunch. I prepared this recipe for 8 so you’ll have plenty protein to munch on for the week. Watch it, though, it may disappear faster than you anticipate!

Zesty Turkey Salad

Cook Time 20 minutes
Servings 8

Ingredients
  

  • 4 cups cubed, cooked turkey
  • cups diced onion
  • 3 microwaved eggs, chopped
  • cup zesty pickles
  • ½ cup sour cream
  • 1 cup mayonnaise
  • 4 tbsp Dijon mustard
  • 2 tbsp prepared horseradish
  • 2 tsp paprika
  • 1 tsp pepper
  • 2 tsp cumin

Instructions
 

  • Combine the turkey, onion, eggs, and pickles in a large bowl.
  • Mix sour cream, mayonnaise, Dijon mustard, horseradish, cumin, paprika, and black pepper together in a separate bowl until smooth.
  • Stir sour cream mixture into turkey mixture until evenly coated.
  • Let sit in fridge for an hour or so before serving to let the flavors meld together.

Video

Home Grown Tomatoes


My friend M’lissa inspired this recipe when she left a jicama at my house after using the other ½ for appetizers.  Tomatoes are abundant in our garden this year, and a tomato salad with crunch?  Well, I hope this recipe makes your list of top hits this summer as you look for uses of those abundant tomatoes!  BTW – Regular tomatoes work just as well as heirloom.

Crunchy Heirloom Tomato Salad

Prep Time 15 minutes
Course Side Dish

Ingredients
  

  • 3 cups heirloom tomatoes - cut into bite-size pieces
  • cups sliced fresh cucumbers
  • ½ cup chopped sweet onions
  • ½ cup 2” length matchstick - cut jicama
  • 1 medium avocado, cut into slices
  • 1 bunch cilantro leaves- approx 1/4 cup

Dressing

  • ¼ cup extra-virgin olive oil
  • 3 tbsp fresh lime juice
  • 1 tsp kosher salt
  • ½ tsp fresh milled pepper

Instructions
 

  • Add tomatoes, cucumbers, onion, jicama, avocado and cilantro to a bowl. (Or for a different presentation, you can place on a platter)
  • Whisk together olive oil, lime juice, salt and pepper to make the dressing
  • Drizzle dressing over veggies